 |
| Garlic Waiting To Go In The Ground |
People tend to leave alot of stuff on airplanes, the most common being magazines. If the hubby finds one he thinks might strike my fancy, he brings it home. Last month, he brought home the August/September issue of "Organic Gardening". The feature article was, "Great Garlic, Our know-and-grow guide to success". That coupled with the stunning photo on the cover had me absolutely burning to make a raised bed and grow some garlic. It was killing me, but I actually did wait until the appropriate time to plant and that time is now!!
 |
| Simple Frame & Freshly Turned Soil |
I must be completely honest here and let you know, today is the first time I have ever done this. The project was rather easy and I had alot of fun playing in the dirt. Because garlic needs plenty of drainage, a raised bed garden is the best choice. I started by making a simple frame (6'x2'), using 2x and four corner brackets. This part took around 10 minutes and that included "measure twice, cut once". I love playing with the hubby's power tools!
Next, mark out the area of the garden. For this, I set the frame where the raised bed will live and spray painted the inside outline of the frame. Once that is done, set the lawn mower to the lowest setting and scalp that grass. (Move the frame first) After the grass is shaved, use a deep shovel to cut the soil and turn over the clumps of sod. I did break the larger clumps into much smaller clumps and move the dirt around until it was close to level. Return the frame to its intended spot and make sure all the required soil has been turned.
 |
| The Larger Garden Transitioning for Winter |
 |
| Cardboard & Newspaper |
 |
| Organic Matter & Top Soil |
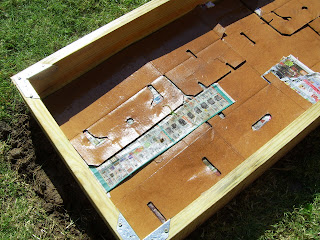
After the wet cardboard, another 4" layer of the clippings from next door. (Compost, composted manure, kitchen scraps, grass clippings, dead leaves and/or a combination of any of the above would be great here.) The final layer in our raised bed is the top soil. I did not have any handy so, I purchased some. I used four, 40 lb bags. They were rather cheap, only $1.97 each. This concludes the building of the raised bed!
 |
| Lines to Plant By |
Now for the garlic!
Separate the cloves from the bulb, leaving the paper on each individual clove. Choose only the largest, blemish free cloves for planting. Each clove should be planted right side up, 4" to 6" apart with 12 inches between rows. For my zone (zone 6), the cloves need to be planted 4" to 6" deep. (Zones 7 or warmer, only 2" to 4" deep.)
 |
| Happy Little Cloves |
Top the soil off with a 2-to-3-inch layer of straw. This will help to keep the soil moist and possible winter weeds in check. Water well, then keep those puppies watered for the next three weeks to stimulate root growth. Now all we have to do is wait until summer to harvest. Can I wait that long? Do I have a choice?
Start to finish, the entire project took only 2 1/2 hours to complete. This includes; mowing the neighbor's front yard and stoping to have a chat with the male child when he got home from school, then later, another chat with the teen. Not bad for an afternoon's work.
 |
| All Tucked In For a Long Winter's Nap |


